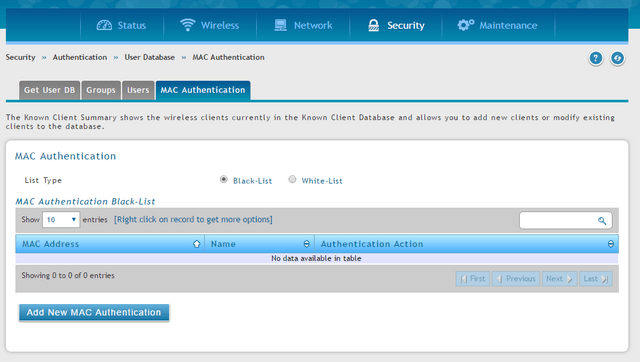
Step 2 – Click on the “Mac Authentication” tab and select either; “Black-List” or “White-List”
-Black-List: blocks the MAC addresses entered in the list -White-List: allows Mac addresses entered in the list
Step 3 - Click on the "Add New Mac Authentication" button to add the MAC addresses to the list
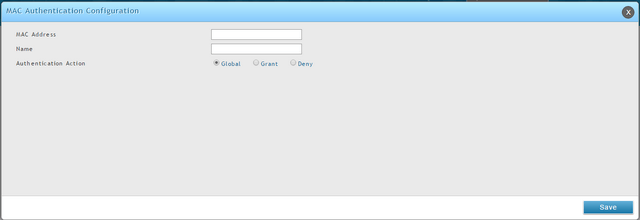
Mac Address:{Enter the MAC address filter} Name: {a brief overview of the device to filter} Authenticathion Action: Select the action to be performed using "Grant" to enable and "Deny" to block.
Click “Save”
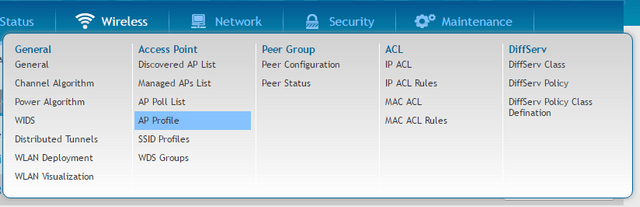
Step 4 – Go to “AP Profile”
Wireless > Access Point > AP Profile
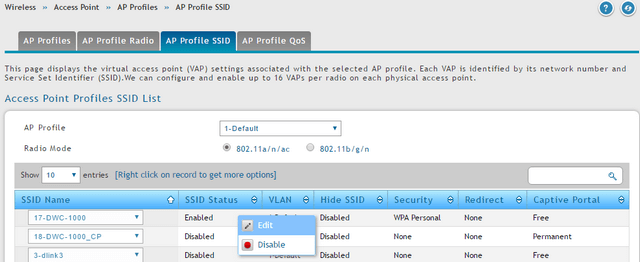
Step 5 - Click “AP Profile SSID” tab, right-click over the SSID and and click “Edit”
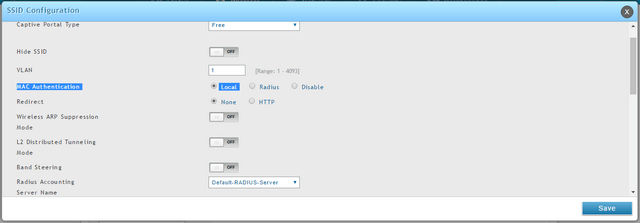
Step 6 - In the option “MAC Authentication” select “Local”, then click “Save”
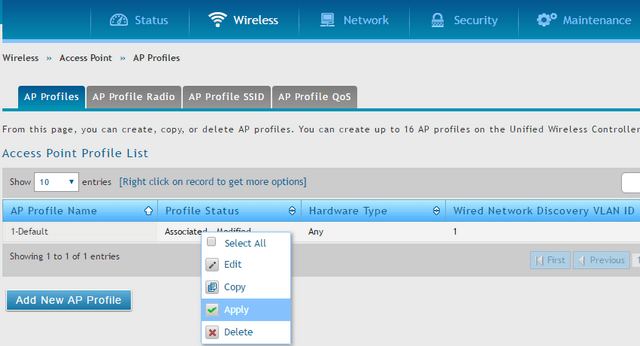
Step 7 - After saving the settings, go to “AP Profiles”
Wireless > Access Point > AP Profiles
Right-click over the “Profile Status” and click "Apply" to apply the changes
Rank: 1.5
0 people found this useful.
Did you find this useful?
0 people found this useful.
Thank you for your feedback.
Sorry we couldn't help! Click here for more FAQs or go to Support.
These may also help:
How to Optimise Wireless Settings DWC-1000 - FW.4.4.xRead Answer