How to Upgrade Firmware via Web Interface - DNR-2060-08P
Note: Please always check our website for updates for firmware
http://www.dlink.com/uk/en/
Step 1 – On the rear-side of the DNR-2060-08P there are 8 ports 1-8. These refer to the port number you will need to use and connect to Web-UI of the camera(s)

Port 0= 80 – Web-UI of the DNR-2060-08P – URL: http://192.168.1.252
Port 1 = 81 – Camera 1 – URL: http://192.168.1.252:81
Port 2 = 82 – Camera 2 – URL: http://192.168.1.252:82
Port 3 = 83 – Camera 3 – URL: http://192.168.1.252:83
Port 4 = 84 – Camera 4 – URL: http://192.168.1.252:84
Port 5 = 85 – Camera 5 – URL: http://192.168.1.252:85
Port 6 = 86 – Camera 6 – URL: http://192.168.1.252:86
Port 7 = 87 – Camera 7 – URL: http://192.168.1.252:87
Port 8 = 88 – Camera 8 – URL: http://192.168.1.252:88
Step 2 – To login to the one of the cameras that are connected to our DNR-2060-08P, we need the IP address + Port number - In our example the URL is as follows: http://192.168.1.252:81

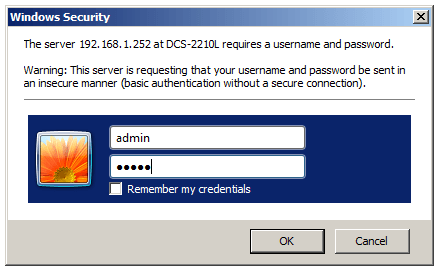
Enter the “Username” and “Password” of the camera then click “OK”
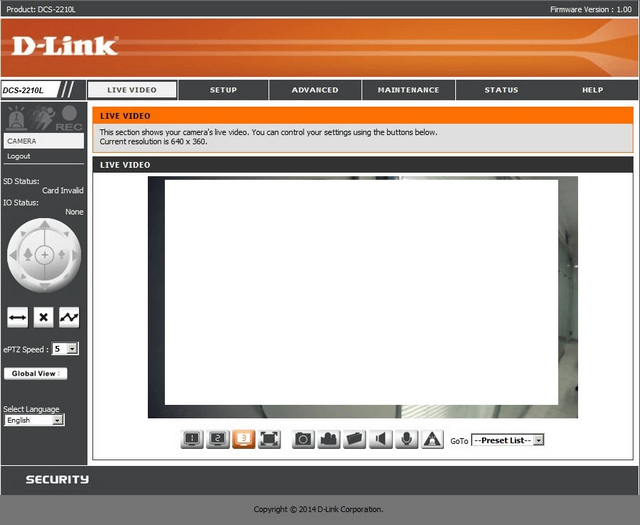
Step 3 – Live view and web interface of the camera
http://www.dlink.com/uk/en/
Step 1 – On the rear-side of the DNR-2060-08P there are 8 ports 1-8. These refer to the port number you will need to use and connect to Web-UI of the camera(s)
Port 0= 80 – Web-UI of the DNR-2060-08P – URL: http://192.168.1.252
Port 1 = 81 – Camera 1 – URL: http://192.168.1.252:81
Port 2 = 82 – Camera 2 – URL: http://192.168.1.252:82
Port 3 = 83 – Camera 3 – URL: http://192.168.1.252:83
Port 4 = 84 – Camera 4 – URL: http://192.168.1.252:84
Port 5 = 85 – Camera 5 – URL: http://192.168.1.252:85
Port 6 = 86 – Camera 6 – URL: http://192.168.1.252:86
Port 7 = 87 – Camera 7 – URL: http://192.168.1.252:87
Port 8 = 88 – Camera 8 – URL: http://192.168.1.252:88
Step 2 – To login to the one of the cameras that are connected to our DNR-2060-08P, we need the IP address + Port number - In our example the URL is as follows: http://192.168.1.252:81
Enter the “Username” and “Password” of the camera then click “OK”
Step 3 – Live view and web interface of the camera
These may also help:
- $name Read Answer