This document is to achieve stacking of several units. Please note that the maximum units that can be stacked are 6 switches of the same family and the switch has two ports for stacking allowing it to use stack in ring topology.
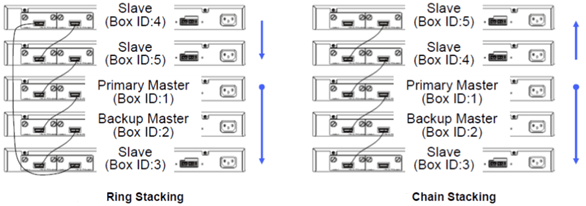
A chain stacking topology allows a maximum bandwidth of up to 20Gbps stacking, where as a closing the ring can reach up to maximum bandwidth of 40Gbps stacking.
Stacking:
Step 1 - Enter the configuration of the Switch through your browser by entering the IP address of the switch, default IP address is 10.90.90.90 so you will need to enter http://10.90.90.90
 The default password is:
User: admin
Password: admin
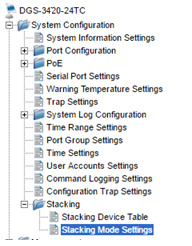
Step 2 - Once inside the switch configuration go to:
System Configuration > Stacking > Stacking Mode Settings
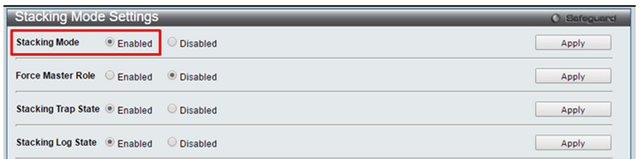
 Step 3
 - Within the "
Stacking Mode Settings" activate "Stacking Mode" setting the option to "
Enabled" and clicking “
Apply”.
•
After applying the configuration click the "
Save" option in the top menu
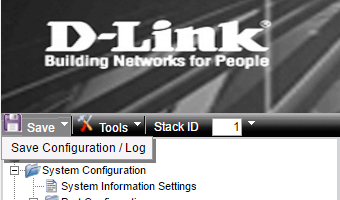 Save Configuration /Log
Type mark in the "
ALL" option and click “
Apply” to save the changes.
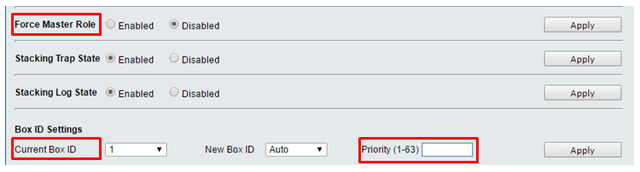
 Step 4
 - Turn on the Stacking in each of the switches, each are assigned automatically an
ID and the role of "
Master", if you want to force the state of "
Master" to a particular switch, check only on that switch the option "
Force master role" and if you also want to specify a different stack ID for each unit, the lower priority will not change the ID only indicate the order in which the role of master performed if the master is removed.
Remember once the settings are saved from the top menu as noted above.
Save Configuration /Log