In this document we will modify the ID of a switch belonging to the stack as well as its priority.
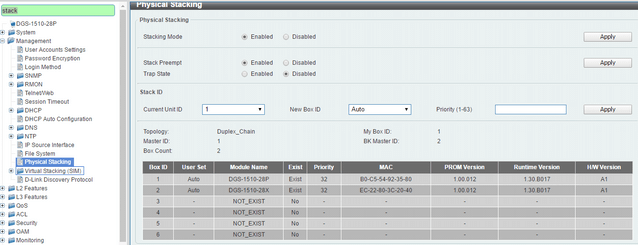
Step 1 – When two devices are stacked (as shown below), we can see that the Master is the DGS-1510-28P with
ID: 1, if we want to change the ID of the unit and re-assign from "Current Unit ID and New Box ID ", go to switch configuration
Management > Physical Stacking
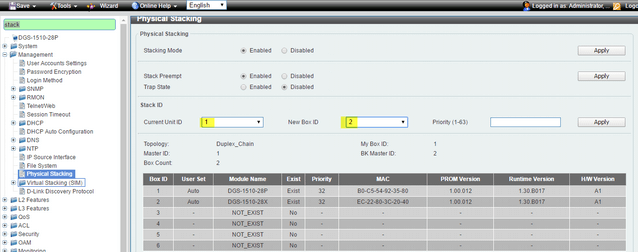
For example, if you want to change the ID
DGS-1510-28P to the
ID:2, select the current unit
ID:1 (current unit ID) and as the new ID,
ID:2 in the "New Box ID" option and click “Apply” to save the changes (
Note: The ID of the unit will be applied after a reboot).
To restart the system enter the top menu:
Tools > Reboot System – Select
“Yes” to save changes and click
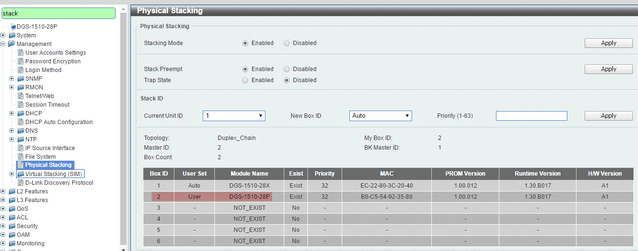
“Reboot”. After reboot, the DGS-1510-28P is assigned to the
ID Box 2.
 Step 2
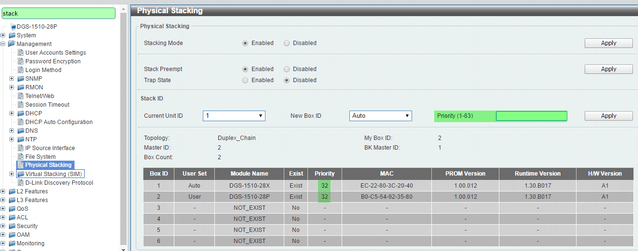
 - Change priority:
We can also change the priority in the field
"Priority” of ID of member, the unit with the best priority will be elected as the master device. A low value means the highest priority. For example; when two switches have equal priority unit, the lowesr MAC address, will have the highest priority. Therefore, the DGS-1510-28P with the lowest MAC: B0-C5-54-92-35-80 .It will become the master device. The DGS-1510-28X will convert into the slave device.
Note: The default priority value is 32, Please check the screenshot below:
Click
“Apply” to save the changes and remember to restart for the changes to take effect.